

Providing good information and hope

Teams match. Dealer East. East-West vulnerable.
Sitting East, you opened 1♠ to show your 5-5 spade-diamond two-suiter:

Then you were not able to bid again:

Not a fakir, your partner chooses the lead of the 2 of Spades over a diamond…
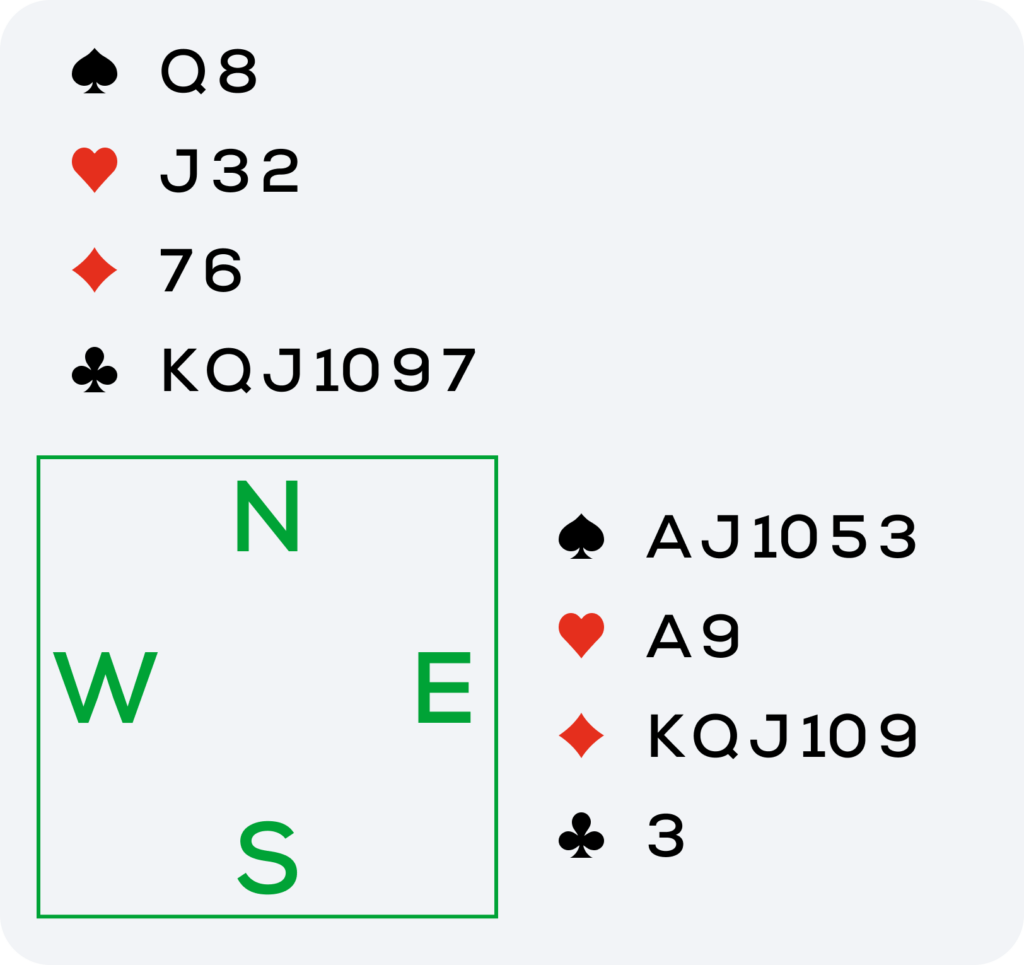
Contract: 3NT.
Lead: 2 of Spades.
South calls for the 8 of Spades from the dummy.
Do you follow with the Ace or the 10?
It could be tempting to outstrip Declarer (establishing race) by rising with the Ace of Spades to switch to the King of Diamonds urgently as long as you have the Ace of Hearts.
Would it be a good idea?
No, certainly not. Just count South’s tricks if you need convincing.
What do you notice?
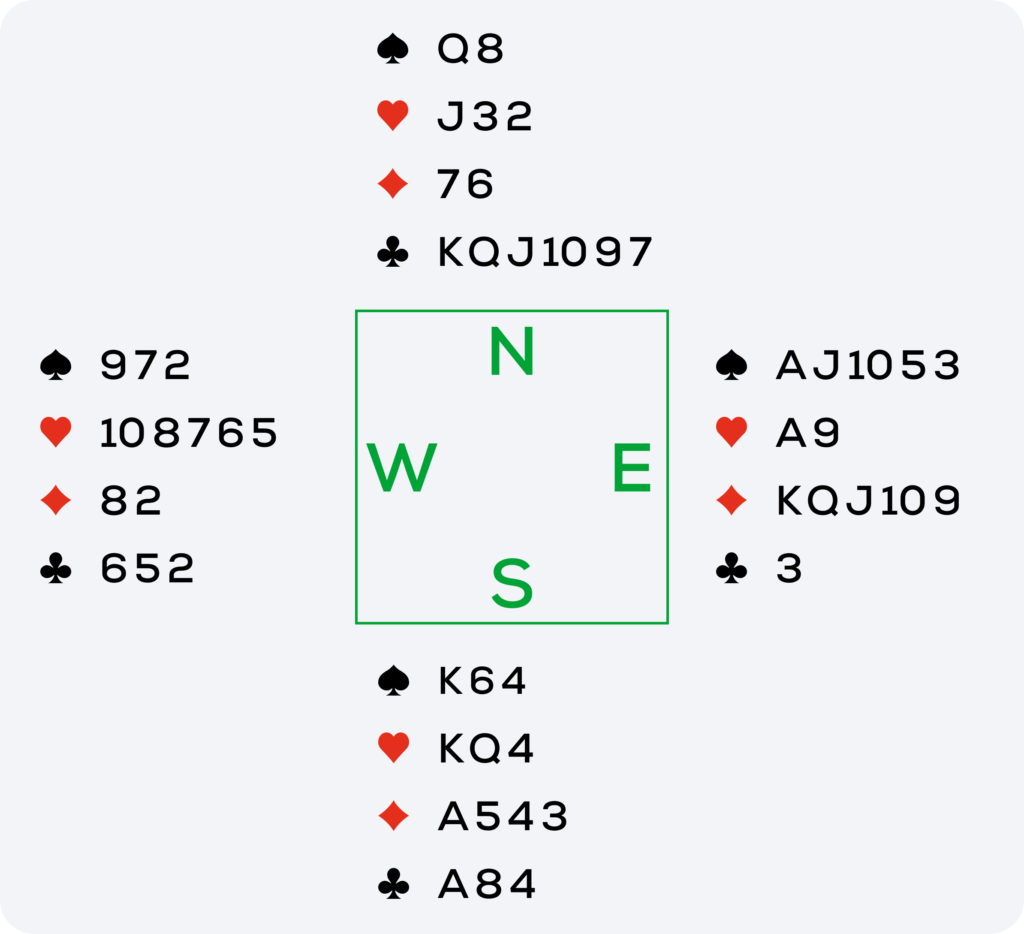
You can see 24 HCP (15 in your hand and 9 in the dummy). South having overcalled with 1NT, you know that he holds all the missing honours, that is the Ace of Clubs, the Ace of Diamonds, the King-third in Spades and King-Queen of Hearts. Therefore he already has seven winners: six clubs and one diamond. If you add the Queen and King of Spades, Declarer will claim 3NT from the outset without having to do anything.
Therefore the only possible option that you have is to put in the 10 of Spades. South picks it up with the King and as could be expected, he cashes his master Clubs, starting with the Ace (West follows with the 2) and continuing with the 4 to Dummy’s King.
Which card do you dispose of?
Your first discard poses no problem. It is the 9 of Hearts. But don’t look the other way. On the run of the Clubs, you will have to discard four other cards from your hand.
Plan ahead what you will do next
You don’t have the choice. If you throw even just one spade, South will play Hearts and you will be held to four tricks (three spades and the Ace of Hearts) for 3NT just making. So, you will need to get rid of four of your five diamonds.
Which ones exactly?
First of all, the King, the top card of your sequence, and then immediately the 9, your “lowest” diamond, so that West can visualise your holding precisely: KQJ109.
What is the aim?
To make your partner understand that the most important card in his hand is the 8-doubleton in Diamonds and he should never bare him, let alone throw it.
Indeed, your message was clearly conveyed since West keeps his two diamonds (82) until the end. And unable to make more than eight tricks (six clubs, one diamond and one spade), Declarer must resign himself to surrendering.
The principle:
At the start of the play, many defensive problems can be solved only if you take a few moments to visualise the position of Declarer’s honours and to count his tricks. Also, you must always apply this rule when choosing your discards: a good defender always gives priority to the “playing” cards, here his four spades.
What did you think of this article?
Share your view in the Comments section below!


Very interesting
Food for thought, good article
great article!
Też tak uważam.
Awesome tips!
Excellent!!
Good lesson. Also make sure your partner understands the King then Nine discard meaning!,