

India Natt’s tournament held on 27 August: deal analysis

Have you played India Natt’s tournament in August? Whether you have played it or not, watch a video replay of her tournament and enjoy her tips to improve your level!
The tournament video
Here is a summary of the most interesting bits of analysis in this week’s tournament.
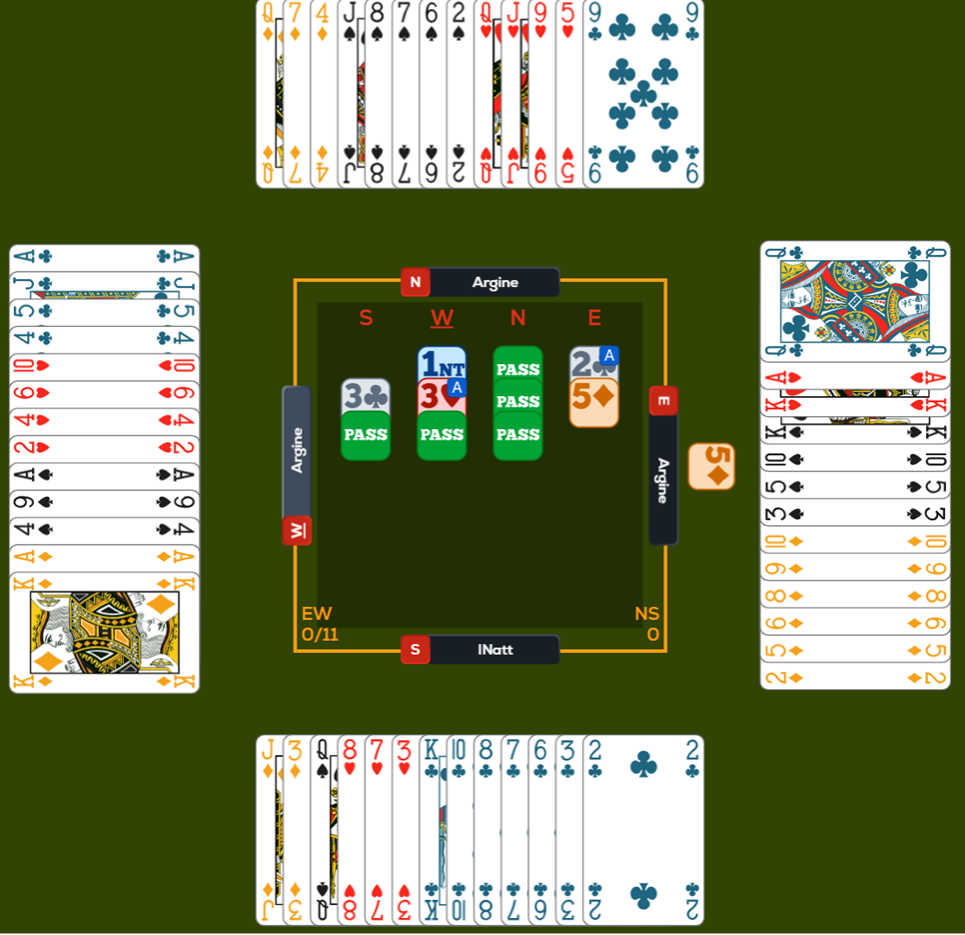
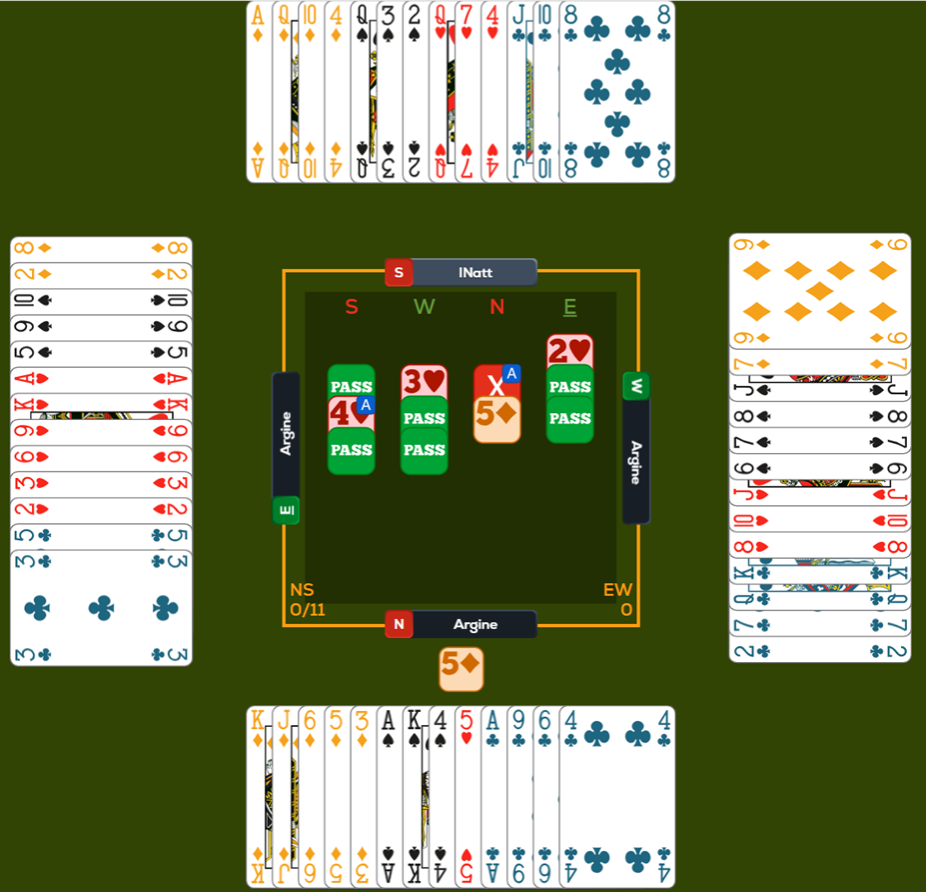
#Deal 1
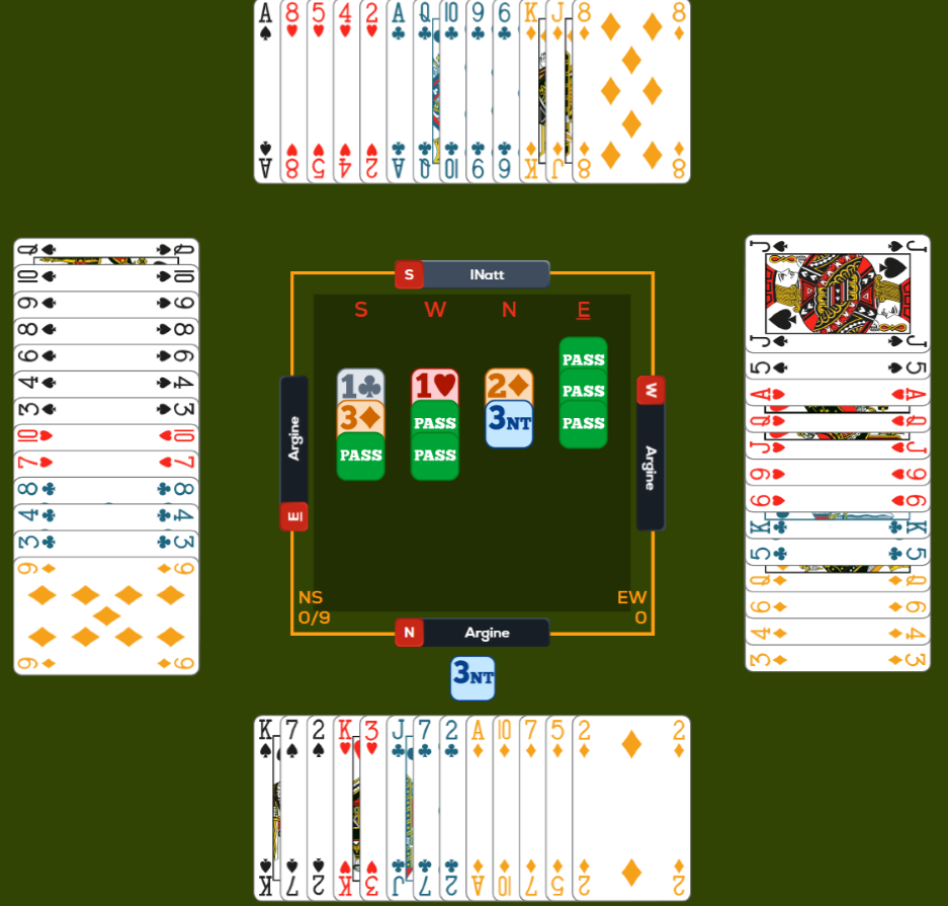
There are three main discussion points related to the play on this hand:
- Which way you finesse in ♦.
On one hand, the ♦Q is more likely to be with East, as you know that West started with five ♥ and East only two. This should encourage you to take the finesse against East by playing low to the ♦J. On the other hand, however, if you are wrong and West wins the ♦Q, he will have four or five ♥ tricks to cash. This should encourage you to take the finesse against West by running the ♦J.
- How your plan changes depending on the opponents’ play in the ♥.
If West ducks the lead to you, East is still not the “safe hand” due to having a second ♥ (unless he started with a singleton). Therefore, you should go with the probabilities and finesse against East.
However, if West wins and clears the ♥, East is now the safe hand, whereas West is the danger hand. You then ensure going no more than one down by finessing against West.
- Remembering to unblock the ♠.
When there is a blockage and you are counting on the tricks from the blocked suit, double-check that your opponents cannot stump you with any return by unblocking the suit before letting them in. The worry here was that you might not be able to afford to lose a trick on the second round of diamonds before unblocking the ♠, as East would might then simply return a diamond to your hand, forcing you to win with your last entry to hand while the ♠ were still blocked.
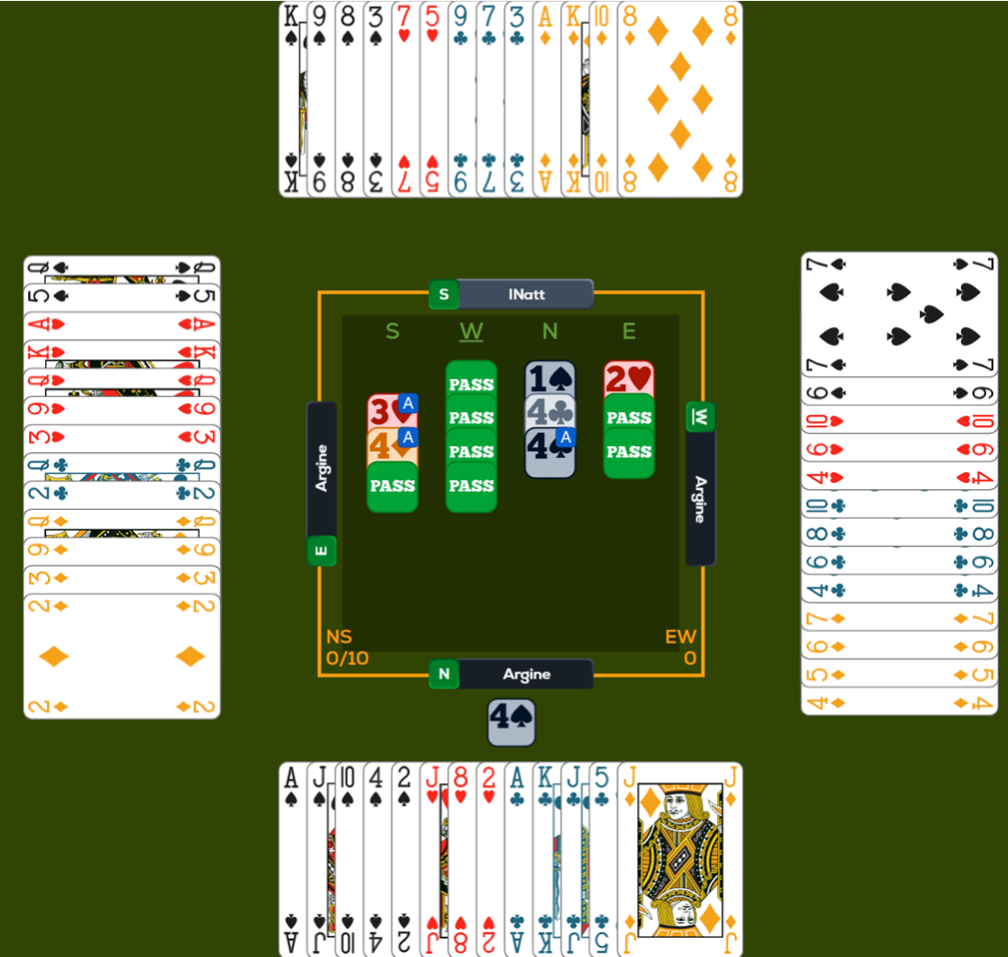
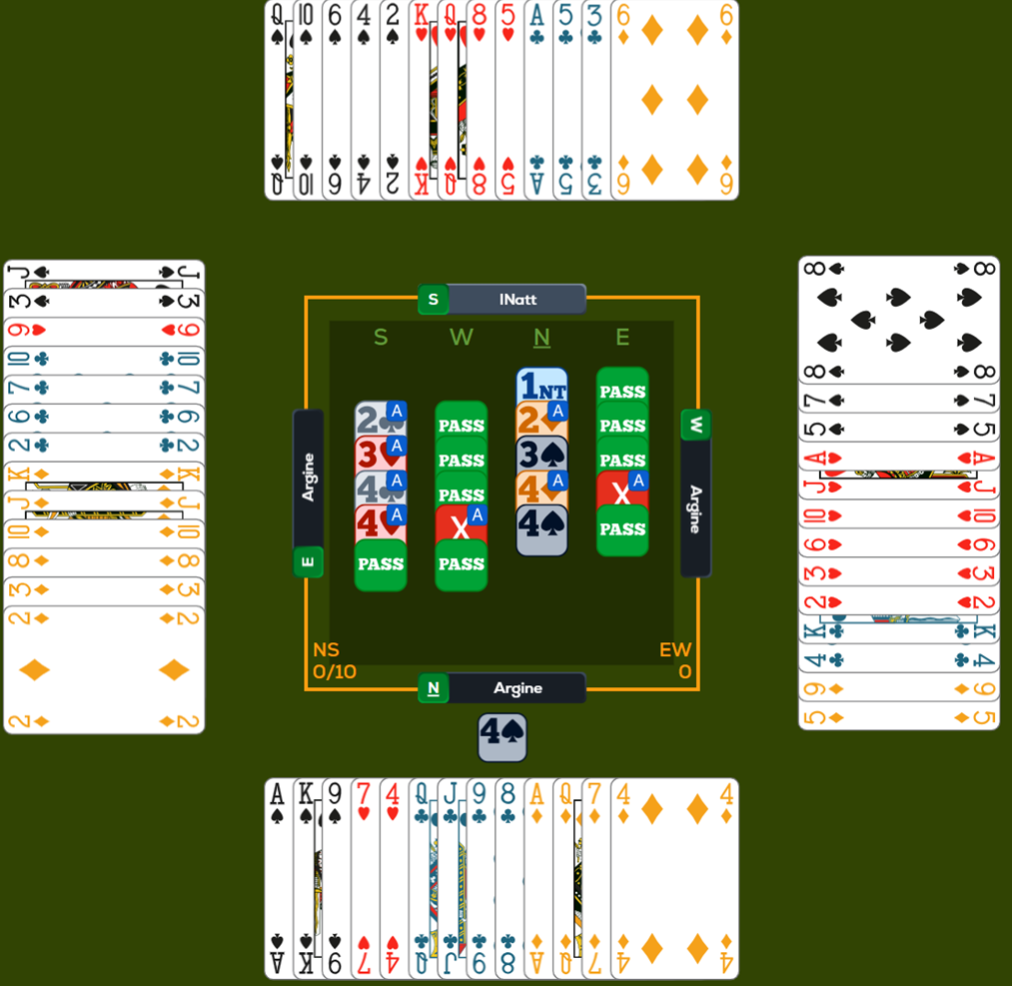
#Deal 2
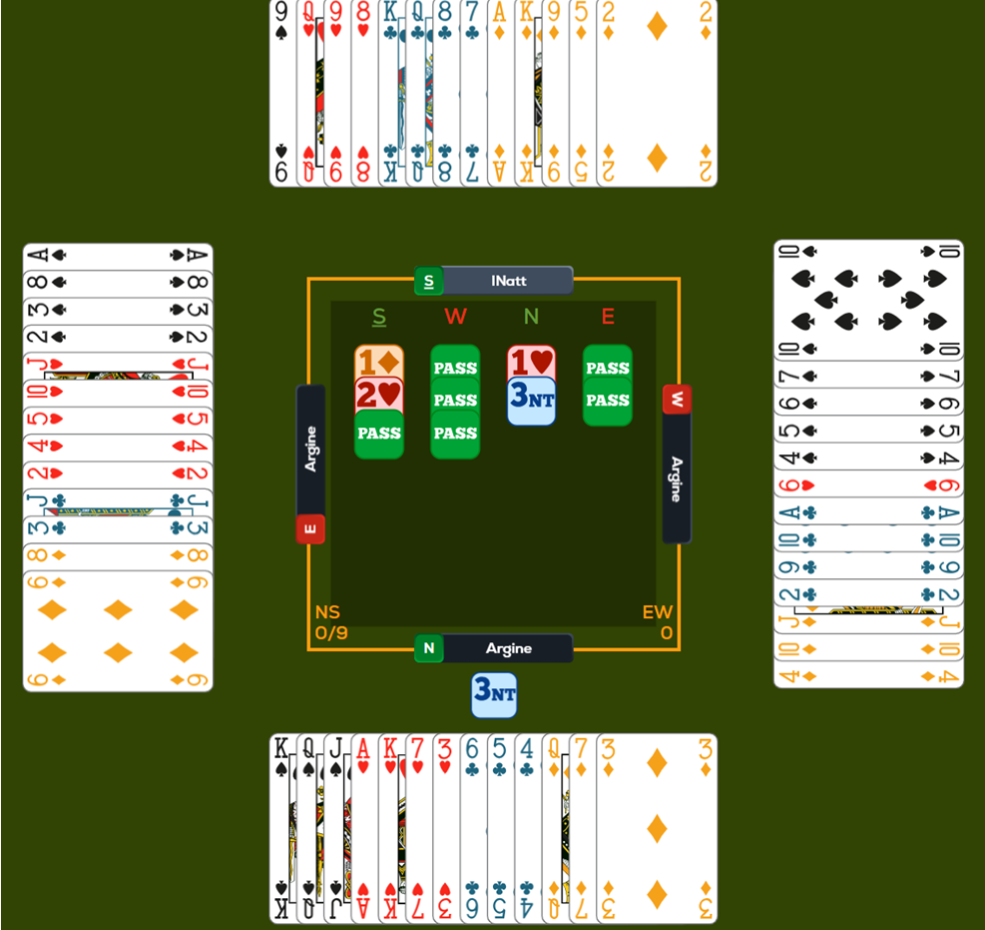
Bidding
South’s rebid is of interest here: the options are 2♣ (to show 5♦4♣ and anything less than a game force) or 2♥ (which always shows a minimum and 3+♥). 2♥ is not only helpful for showing the hand’s strength better but also means you can find a 5-3 heart fit even when Partner is not strong enough to bid Fourth Suit Forcing. With a pure hand such as this, with a singleton in the short trump hand and the short trumps headed by the ♥Q, it looks really appealing to bid 2♥.
Importantly, your partner needs to be aware that you might only have three-card support here. With only four hearts, he should offer NT at the appropriate level for the strength of his hand (here, 3NT) and expect you to convert when you are sure you have an eight-card fit.
Play
Remember not to be too optimistic when counting your winners in NT! The spade lead gives you one trick but not necessarily two (unless the ♠A is used on Trick 1). Then, recount your tricks frequently throughout the hand to get a good idea of the updated total and how you are progressing.
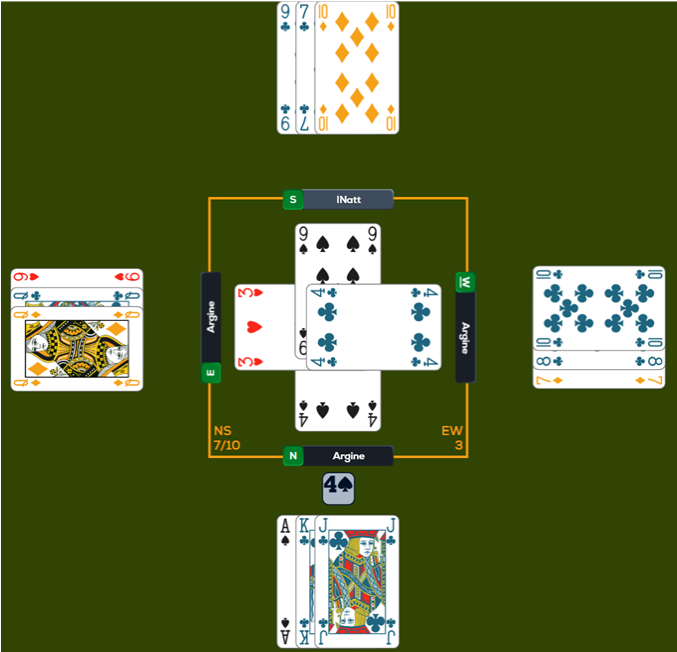
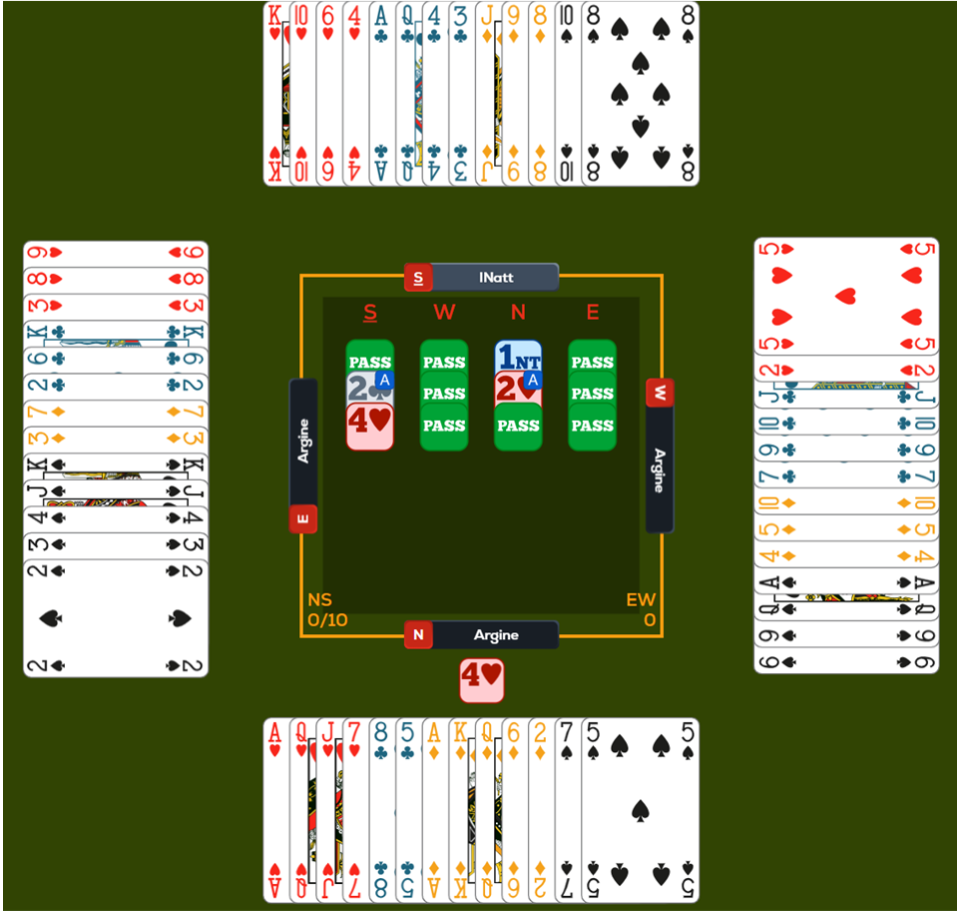
#Deal 3
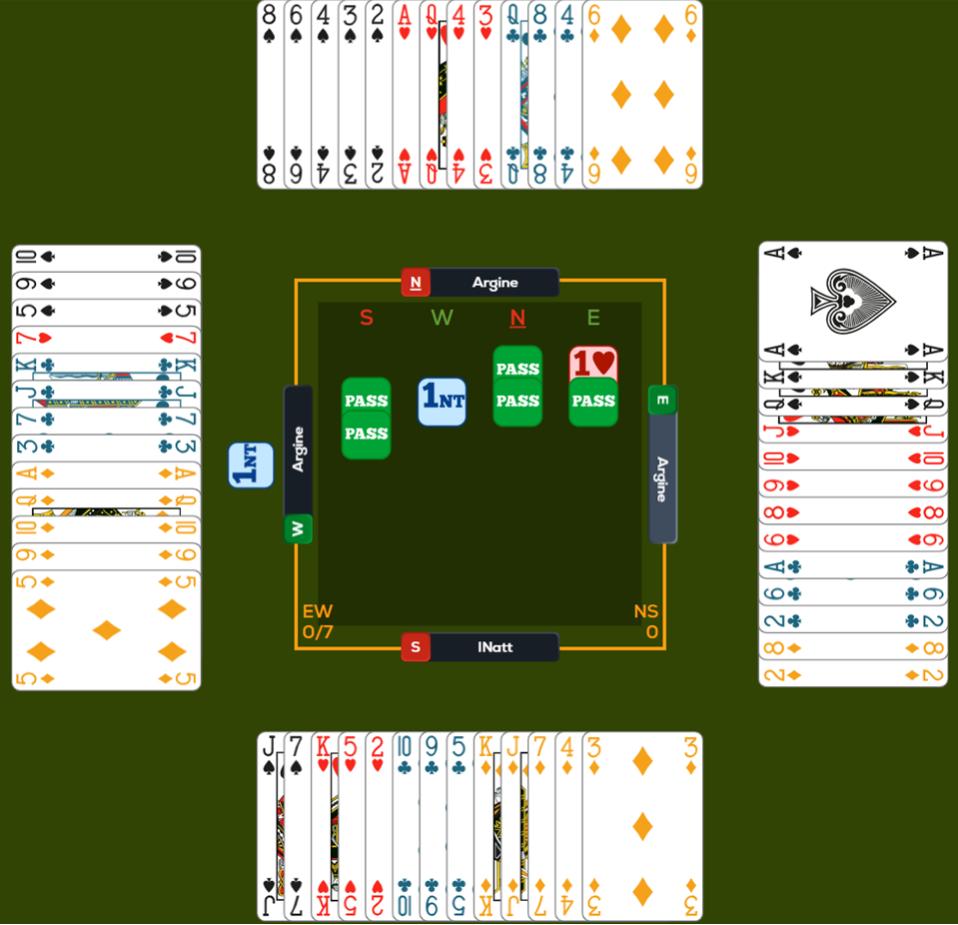
Note how I worked out that Partner had at least five spades here. Once I could see the dummy, I knew there were eight outstanding in the unseen hands; West’s 1NT response had denied four spades, so Partner had to have at least five!
I was also able to work out that Declarer had at most two hearts: with three, he would have been able to support his partner’s 1♥ opening. With at most 3-2 in the majors, he was marked with a lot of minor-suit cards!
#Deal 4
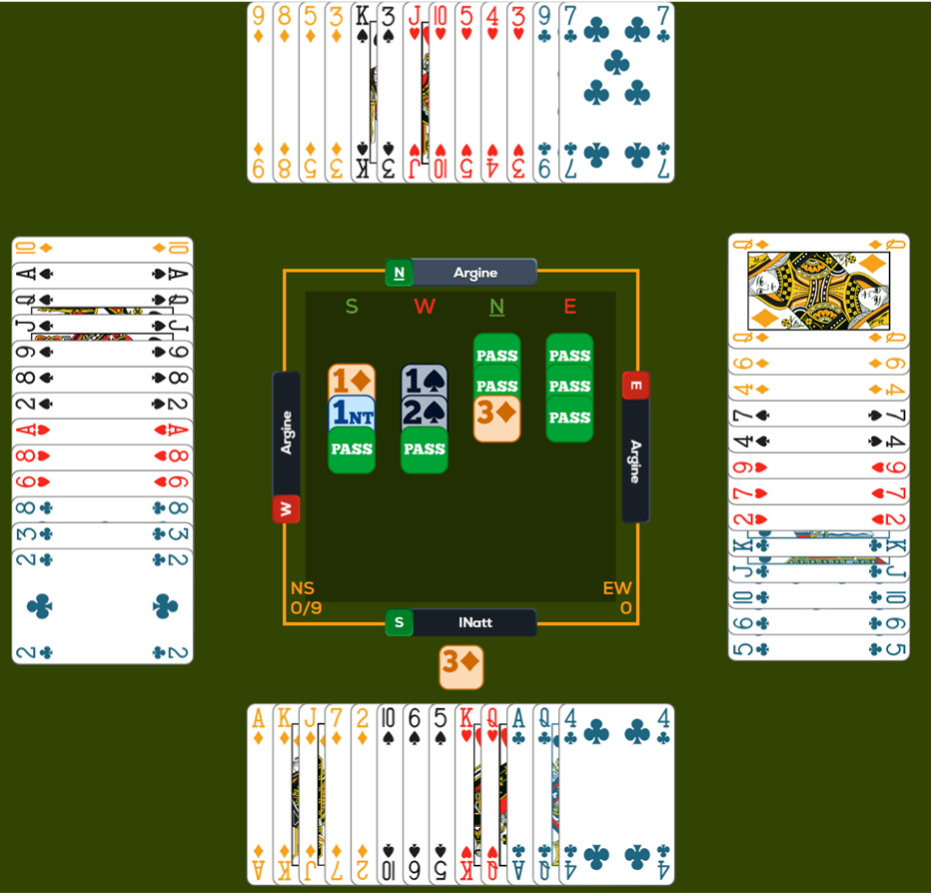
To risk the diamond finesse or not? It’s definitely more likely to be working once you know that West has six spades (and indeed, today it is)… but given the lead (showing what looks like a three-card suit) and the fact that you have seven hearts, playing West for 6-2-2-3 starts to seem reasonable too! There is no guarantee of being able to discard your losers given the heart blockage, so safety could be key here to ensure your ten tricks – especially as 3♦ is not going to be the most common contract! This is all good food for thought when making these decisions, although in hindsight, eschewing the finesse was over-cautious. Next time, I shall go with the probabilities instead.
#Deal 5
Aggressive competitive bidding really paid off here: it scared the opponents out of their superior 3NT contract and took up valuable space in the auction, which doubling would not have done. The vulnerability made it risky with this suit quality; but we knew they almost always had a game on, so with them being vulnerable too, the possibility of them collecting +500 rather than +600 for their game would still make us plus overall! And that does not take into account that they might have had a slam on too (as they happened to today, though they were not supposed to bid it) as far as we knew at that point in the auction.
#Deal 6
I fell afoul of not one but two doubleton queens here! But went with the probabilities each time. In Trumps, especially knowing that East had at least eight cards in the red suits, he was very likely to have a singleton spade; the finesse was then the better play.
In this ending, I knew that East had been 2-5-4-2 initially:
I knew that because I had seen both spades, he had bid the hearts and his carding – high-low – showed an even number of diamonds; then, I had seen a third one, so he couldn’t have had two. This gave him just two clubs to West’s four. Once again, the probabilities favoured the finesse. Unlucky!
#Deal 7
Read the auction to find the best lead!
Yes, Partner has bid 1♠; but he probably only has five here, given his non-vulnerable pass over the double. We can deduce:
- The opponents have more spades than we do.
- They may well incorrectly assume that our partner has the ♠A.
So, not a spade; what about our own long suit? Well, here, our left-hand opponent has shown four or five hearts and East two; it looks pretty likely that Partner will be short, so if we have a fit, it is not going to be in Hearts. It is often going to be in Diamonds, so leading a diamond is best (and proved to be a good idea today).
#Deal 8
5♦ is the best contract here; those bidding 3NT were lucky that South’s ♥Q74 was a stop after the heart raise by West. The idea of playing in 3NT with that stop when my partner was known to have a singleton frightened me off – and I love playing in 3NT!
The question is: what should you bid over Partner’s double with the North hand? Well, you have to go for game and 4♠ or 5♦ might be right, so how do you keep your options open? Cue the opponents’ suit! With five spades, Partner will offer spades; if not, you can play in 5♦ instead. Keep the bidding flexible!
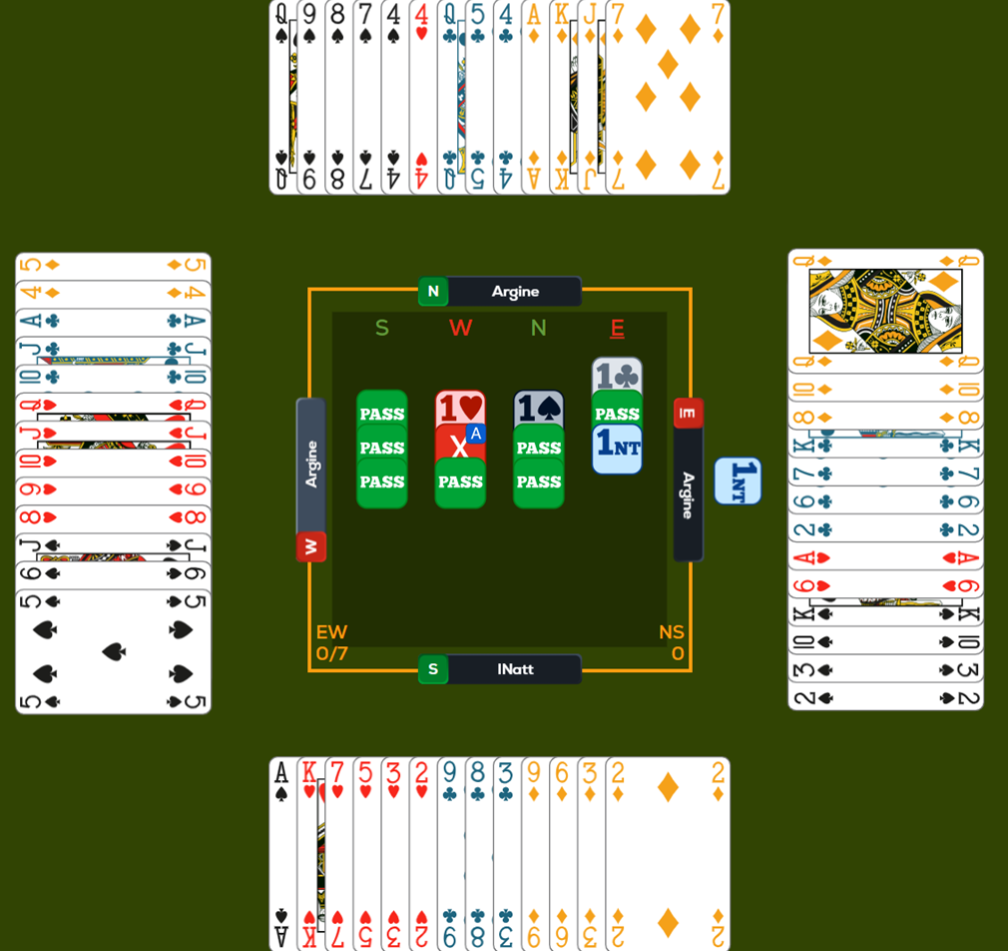
#Deal 9
Bidding
Be really comfortable with how to bid hands with 5-4 in the majors after Partner opens 1NT. How do you show:
- 5-4 weak;
- 5-4 invitational;
- 5-4 game-forcing?
When looking to bid a slam, see whether you can construct hands for your partner that are both consistent with the bidding and where slam is 100% or a strong favourite to make. And if you poke your partner with a minimum try and he signs off, trust him!
Play
With such high trumps in the shorter trump holding, maintaining trump control will be difficult if you have to ruff your heart losers. If East had not ruffed a heart, you would have needed to play the clubs correctly to make (especially given that East’s double of 4♦ almost certainly shows the ♦K). The ruff actually aided trump control here because you started the hand with three heart losers.
#Deal 10
This hand was straightforward. The main takeaway here was to count winners rather than losers and to consider what you might do if the trumps broke badly. If you are in an easy contract, consider potential bad news!
What did you think of this article?
Share your opinion in the Comments section!


thank you – its very interesting to hear your thoughts!