

À la Reese

Who said that only great champions can write bridge articles? Funbridge launched a brand-new format of article a few months ago. You, talented players, will be our bridge authors and give your expert opinion about deals of particular interest to you. We are delighted to share a fascinating article written by a member of our community just below.
Focus on the auteur
Yoram Aviram is an experienced bridge player and a former member of the Israeli Junior and Open teams with several achievements on the national and international scenes.
Yoram left the game many years ago to focus on family and work (in the field of computerised trading of financial instruments) and switching hobbies from the mind sport of bridge to the physical sport of competitive road cycling.
He is now returning to his old passion and has adopted Funbridge as the platform on which to refresh his old skills.
He is happy to share deals of particular interest with the Funbridge community on the blog.

À la Reese
One of my favorite bridge writers since learning the game some 40 years ago, has been Terence Reese (1913-1996), a great champion of the game and one of the finest ever bridge writers. A classic Reese book I’ve read a few times and am reading again these days is “Play these hands with me”. In this book Reese is walking the reader through the play of the hands, explaining his thoughts and actions, as if the player sits next to him. Deals are from actual play, at the club or at tournaments. Reese’s card reading and technique are often quite spectacular. The following hand, played on Funbridge, has the “feel” of those Reese hands. I will try to tell it “ā la Reese”.
Playing a Funbridge challenge against a strong Israeli player, I hold the following cards
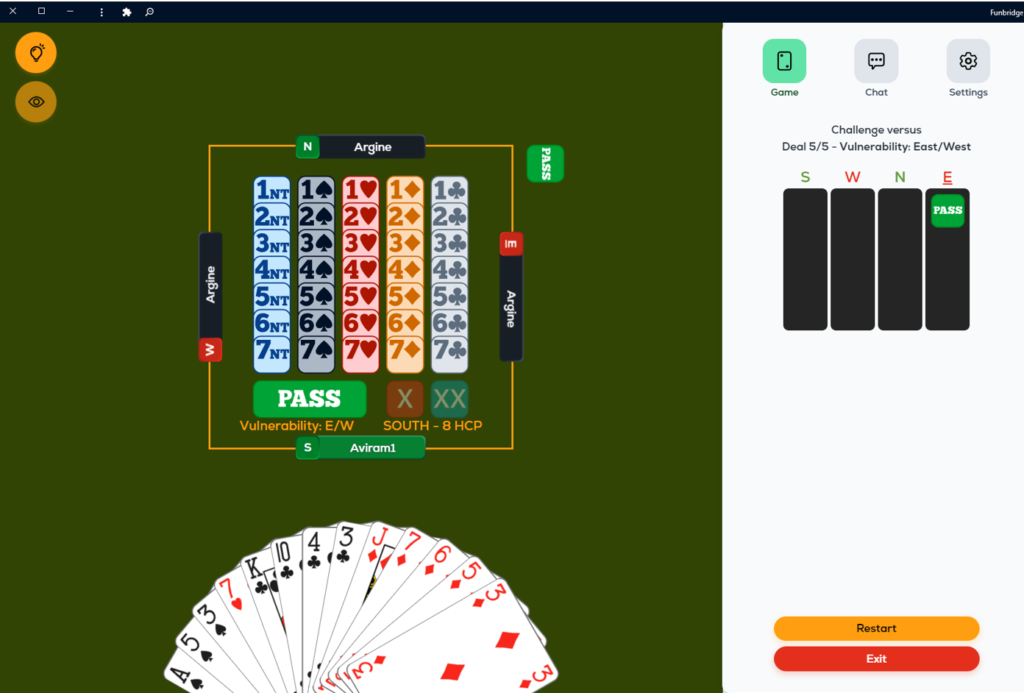
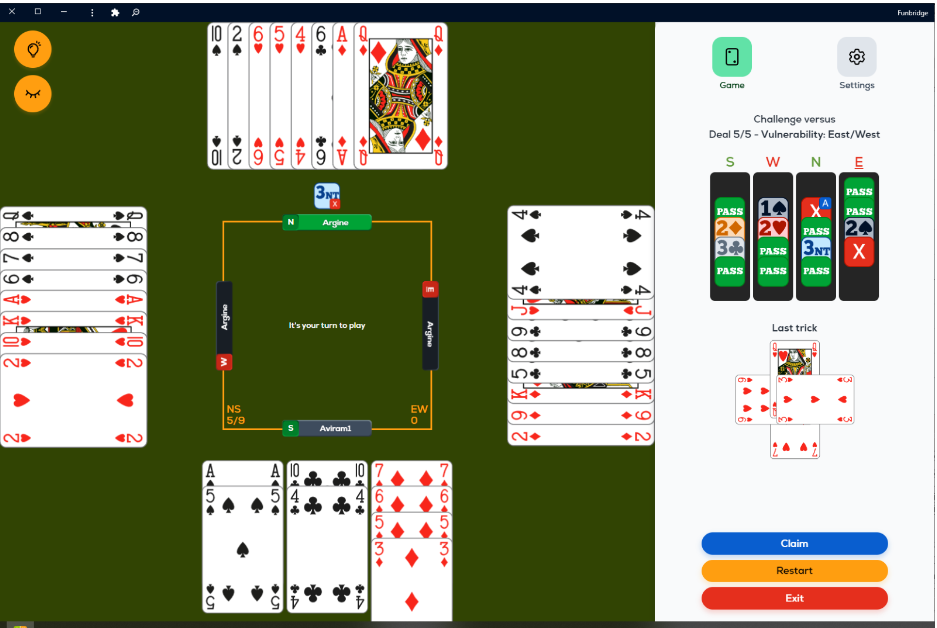
East on my right passes, I pass, West opens 1♠, partner doubles, East passes. How should I respond? My hand is “in between”, a bit too good for a negative 2♦ response, but slightly below what I’d like for a jump to 3♦. The strength is right for a 1NT response, but a Diamond contract seems safer. At IMPs, non vulnerable, I finally settle for 2♦. West bids 2♥, North passes, East corrects to 2♠, and after my slight previous underbid I feel justified to compete with 3♣. West passes and North finds new strength with an unexpected bid of 3NT! East on his turn, apparently unimpressed, promptly doubles and all pass. It has been an eventful auction from which I’m sure a few inferences can be drawn. Meanwhile East leads the ♠9 and as my hand is the dummy, I’m going to play the hand from North:
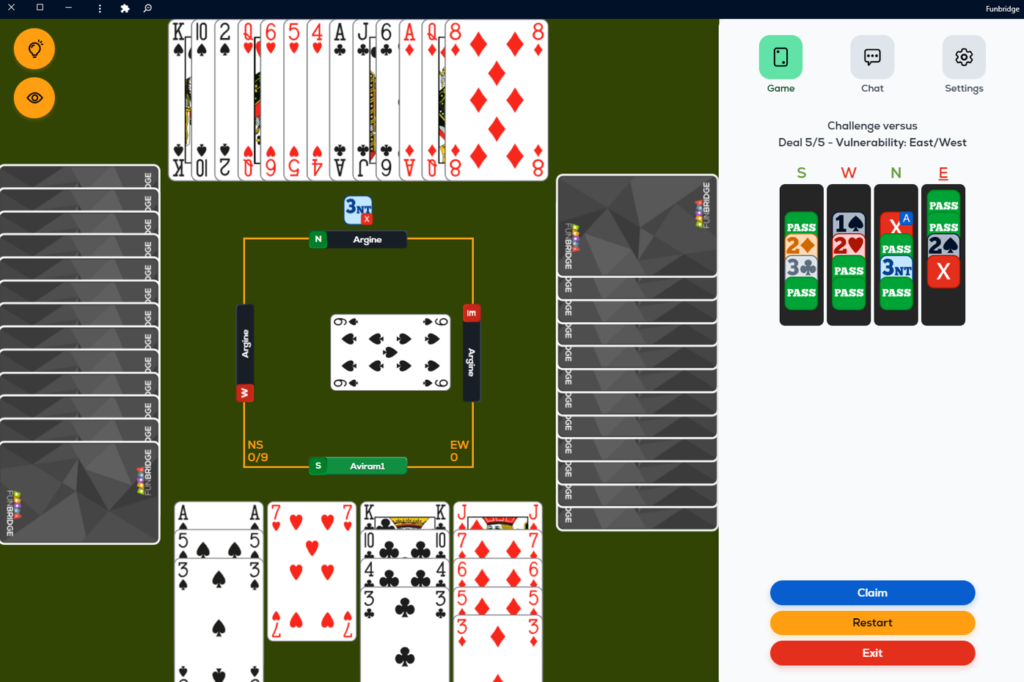
North does have some extras but I would prefer a 1NT overcall with his hand.
With just 5 top tricks and probable uneven distributions, prospects seem quite gloom. East’s double surely is based on strong minor holdings. As the bidding was quite detailed, let’s try to construct the opposing hands: We have, between us, 24 points. That leaves 16 for opponents. West opened the bidding and East doubled the final contract, so the points are probably distributed around 11 (West) – 5 (East). West, for having bid both his suits with a minimal opening hand must have compensating distribution, at least 10 major cards.
East on the other hand, for his double, should have the minor honors and length. East corrected West’s 2♥ bid to 2♠, so he should have exactly 2 cards in Spades and maximum 3 in hearts.
To the play. I must develop some tricks in the minor suits, and as I’m certain East holds long Diamonds including the K, I feel the best initial move is to put him in a dilemma, playing a small diamond from North’s hand. An immediate jump with his K will surrender a few Diamond tricks. A low play will allow me to both win a quick Diamond trick and keep a Diamond threat (AQ) in my hand. Furthermore, it doesn’t seem right to duck the first spade trick as opponents can easily switch to hearts leaving me out of resources. So, the correct Spade play is low from dummy capturing West’s J with the K in my hand. That also leaves a potentially useful Spade threat over West.
As planned, for the second trick I play a low Diamond from hand. East plays low and dummy’s J wins the trick, West dropping the 10. In a few tricks, I plan on forcing west to surrender a major trick or two. For that end, it must be a good idea to now play the Clubs, removing possible exit cards from his hand. Accordingly, I play a Club to my A, both opponents following, and next the Club J from my hand. East covers with his expected Q, dummy’s K wins, west discarding the Heart 8.
So, West has a singleton Club, possibly a singleton in each minor. If so, then he has 11 major cards, probably 5 Spades and 6 hearts (This is consistent with his bidding since with around 11 points he is not strong enough to open 1♥ and later reverse into spades). It’s still possible that West is 5-5-2-1, but then diamonds are 3-2 and might provide 4 tricks, to a total of 9 (Dummy still has an entry via the ♣10). It’s certain now that West, for his opening bid, has the AK of hearts. That is the position and according to my plan I now play the ♥7 from dummy.
The idea is: After West wins this trick, he has to either play a diamond – then Diamonds are 3-2 and I have 9 tricks, or he may play a Spade allowing a trick to my 10, or he may play a heart allowing a trick to my Q.
On the Heart West plays the 9. I wasn’t expecting this. I play my Q, East the 3. So, I’ve made a quick Heart trick, my 8th, but it seems West’s play was his best option. It preserves communications between defender’s hands. Let’s ibserve the situation once again:
I have made 5 tricks and have 3 more, the Spade and Diamond Aces and the Club 10. That’s 8. Where will the ninth come from? I must try to endplay an opponent to give me the extra trick in Spades or in Diamonds. I’m going to play a heart and see what develops. East plays the J, I discard a Diamond from South, and West lets East win this trick playing the 2. East now plays the ♠4. Annoyingly, opponents are defending perfectly! If west would have rushed to take his Heart tricks, he would have been endplayed to finally concede my needed extra Spade trick. By letting East win that heart trick, he enabled him to play back a Spade, destroying the Spade threat.
As it is, I have no choice but to Take my ♠A at once, and hope East is now stripped of exit cards (i.e., West had an original 5-6-1-1 distribution, which is quite likely given his 10 points opening bid).
Hopeful, I now play the 10 of Clubs followed by another Club. East wins one more Club but has to finally play a Diamond into my AQ giving me the 9th trick.
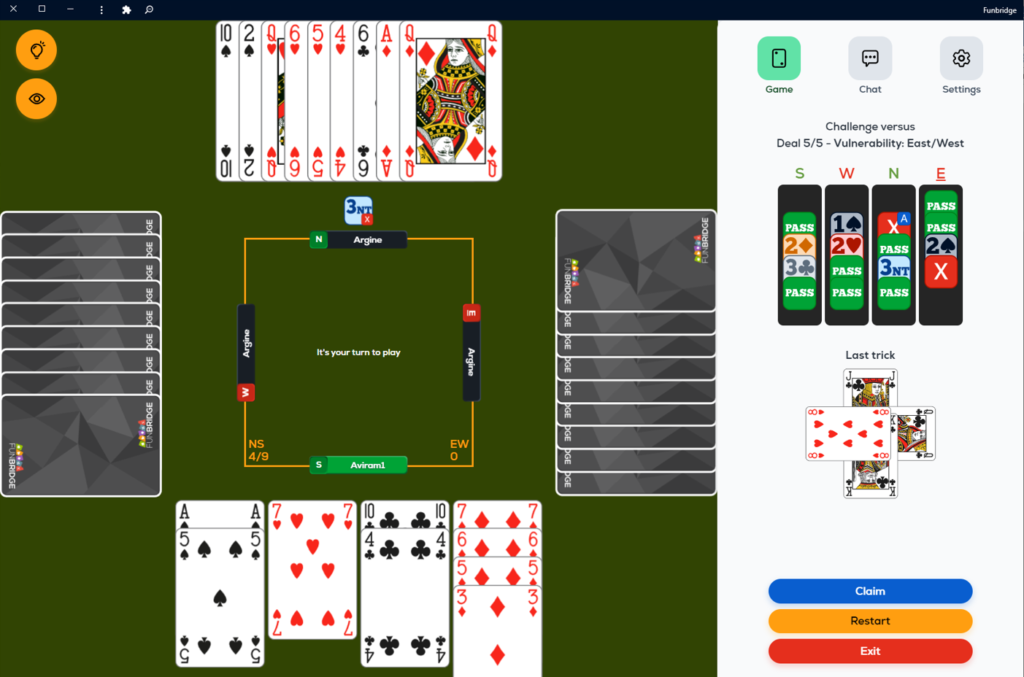
With cards exposed, that was the position after the 5th trick:
North plays a heart. If West overtakes this, he can take 4 heart tricks but is forced to concede a trick to the 10 of Spades. So, West allows East J to win. East does his best playing a Spade to dummy’s A, but now the elimination is complete and east is put on play with Clubs to surrender a trick to the Q of Diamonds.
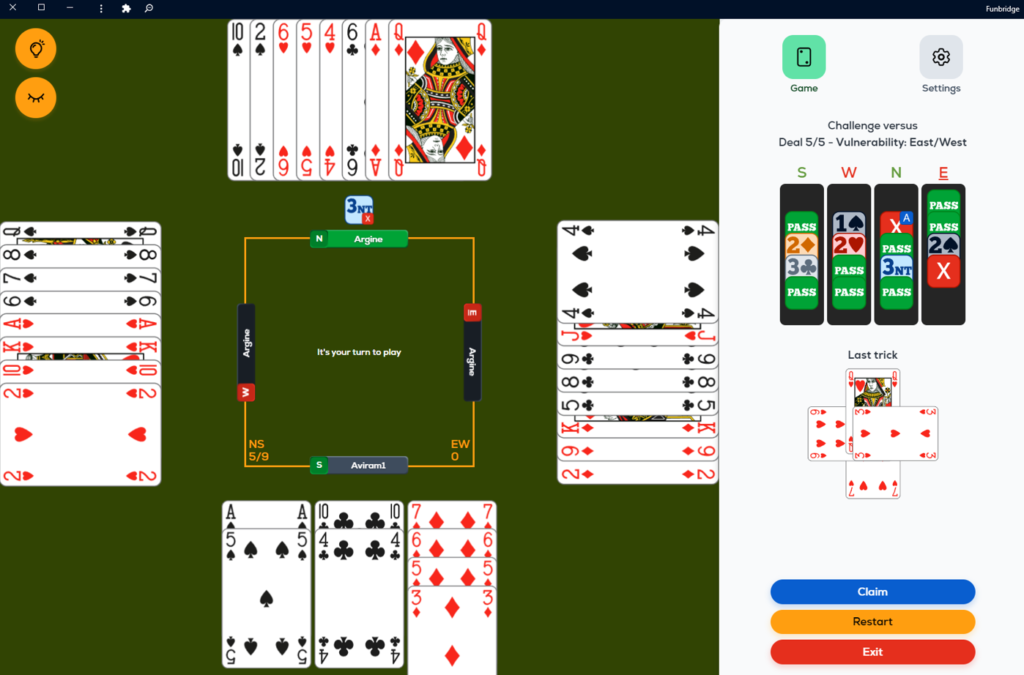
Those were the full hands:
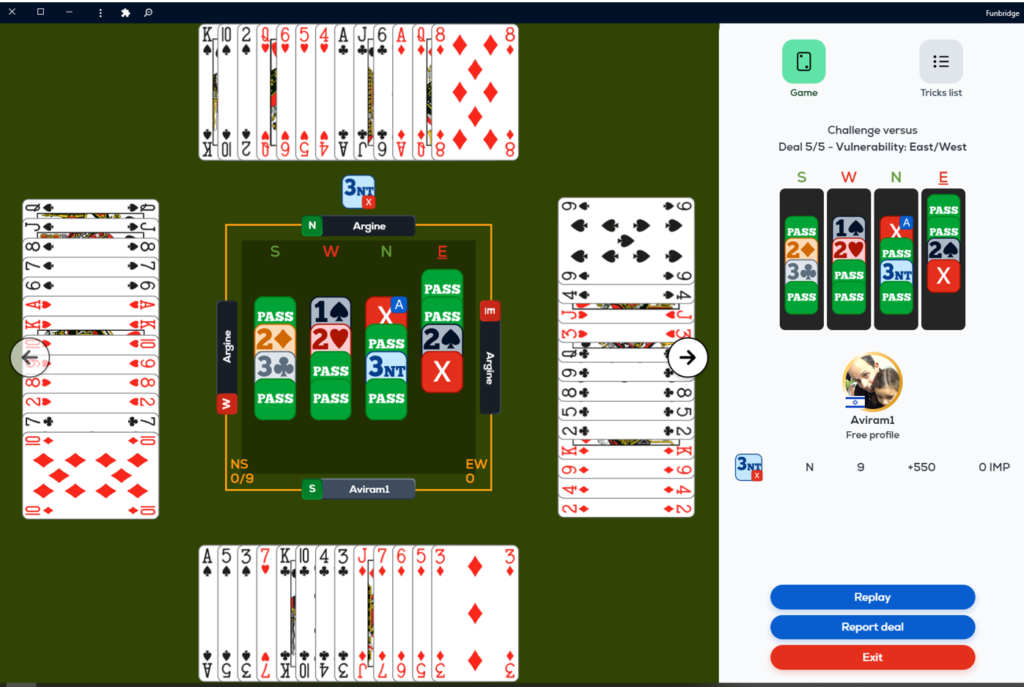
As it turns out, all my efforts earned no reward. At my opponent’s table the bidding and the opening lead were the same. After winning the spade K however, he played the ♦A, then the Q. The fall of the ♦10 enabled a simple finesse of East’s 9 and 4 diamond tricks were enough for 9 easy tricks.
This hand is an extreme example of how informative defender’s bidding can be for declarer. Here opponent’s bidding helped declarer pinpoint almost every honor card as well as the distribution of the opposing hands, even before play commenced.
Bridge theory extensively discusses bidding systems, agreements and exact meanings. Those are admittedly important, as long as we remember the main purpose of bidding – find the right contract to declare, not just exchange information for the sake of it.
On this specific hand, I cannot criticize west’s bidding. He has a powerful distribution in the major suits, justifying a legitimate expectation to win the contract. East’s double, on the other hand, is not beyond criticism, especially played against a declarer inspired by Terence Reese…
What is the concept behind the community articles?
Would you like to write an article too? We at Funbridge like giving our players a voice. Here is a format of articles written by the players themselves. If you see a deal of particular interest and you want to share it with the Funbridge community, tell us in the Comments section below! We will get back to you soon.

Content manager
What did you think about this article?
Share your opinion in the Commentary Section below!


good article!
Yes yes yes
What happens if E plays ♣9 instead of ♠4?
If East plays the Club 9 instead of the Spade 4, declarer can choose which defender to endplay: West with a Heart, or East with a Club.
Nice
Muito interessante.
I love ❤️ this article
Great article, like your previous one. Keep them coming!
Love the article and the classic expert reasoning for all plays. Only quibble would be if you had been able to reverse the hands in the image so that declarer was on bottom and dummy on top. Keep them coming Aviram!